hexo 博客图片 webp 优化
近期打算写一些游记,一看手机拍的照片大小都在 5Mb 以上,所以想着研究一下图片优化方法。主要了解了Imgbot 和 Webp 两种方法,最后选择通过腾讯云来优化图片。
Imgbot
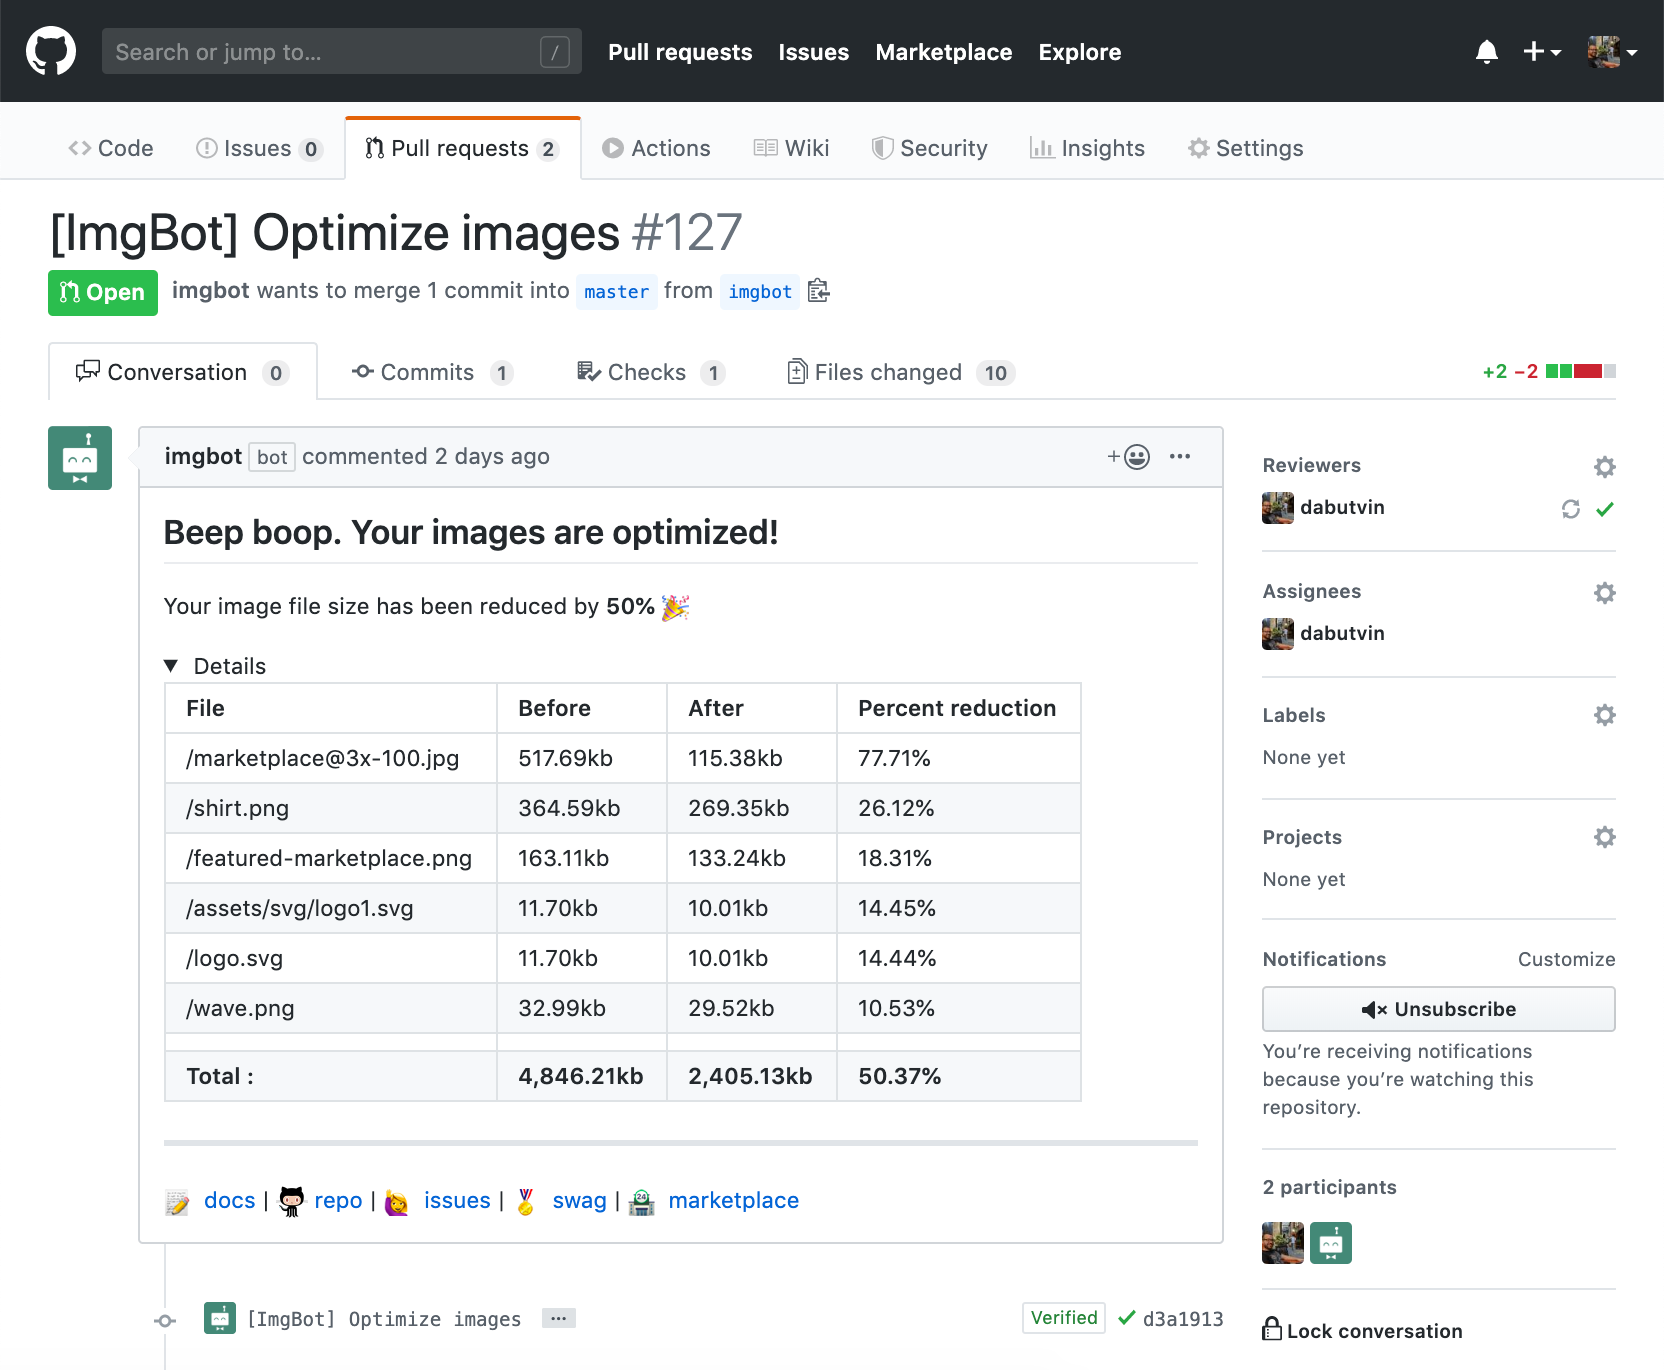
- 从这篇文章了解到 使用 ImgBot 无损压缩博客中的图片 – Mogeko’s Blog,大概用法是将 Imgbot App 添加到 Github 指定的库内,它会递归遍历所有的图片,然后再发起一个 pull request 用压缩后的图片替换原始图片。如下图所示:
- 看起来挺方便的一个工具,不过可惜的是只有 public 库可以免费使用,最低付费价格 79 刀一个月。。。另外建了一个测试库,1 个小时过去也没给我压缩好。。。
Webp
- Webp 最早从木子博文 让图片飞起来 oh-my-webp.sh ! | Reimu’s blog (k8s.li) 里了解,是一种为网页而生的图像格式。很香,但需要自己自建服务器进行一系列的操作。
- 不过这次又找到一篇新的文章 个人博客访问速度优化:CDN, 图片压缩, HTTP2 (selfboot.cn),selfboot 通过腾讯云将图床上的文件处理成不同大小的 webp 图片,hexo 生成 html 时用新的图片链接替换原始图片链接,最后实现不同尺寸的设备能加载不同图片,更进一步优化图片访问体验。
图片格式优化
- 一直以来使用腾讯云的图床托管图片,链接类似于
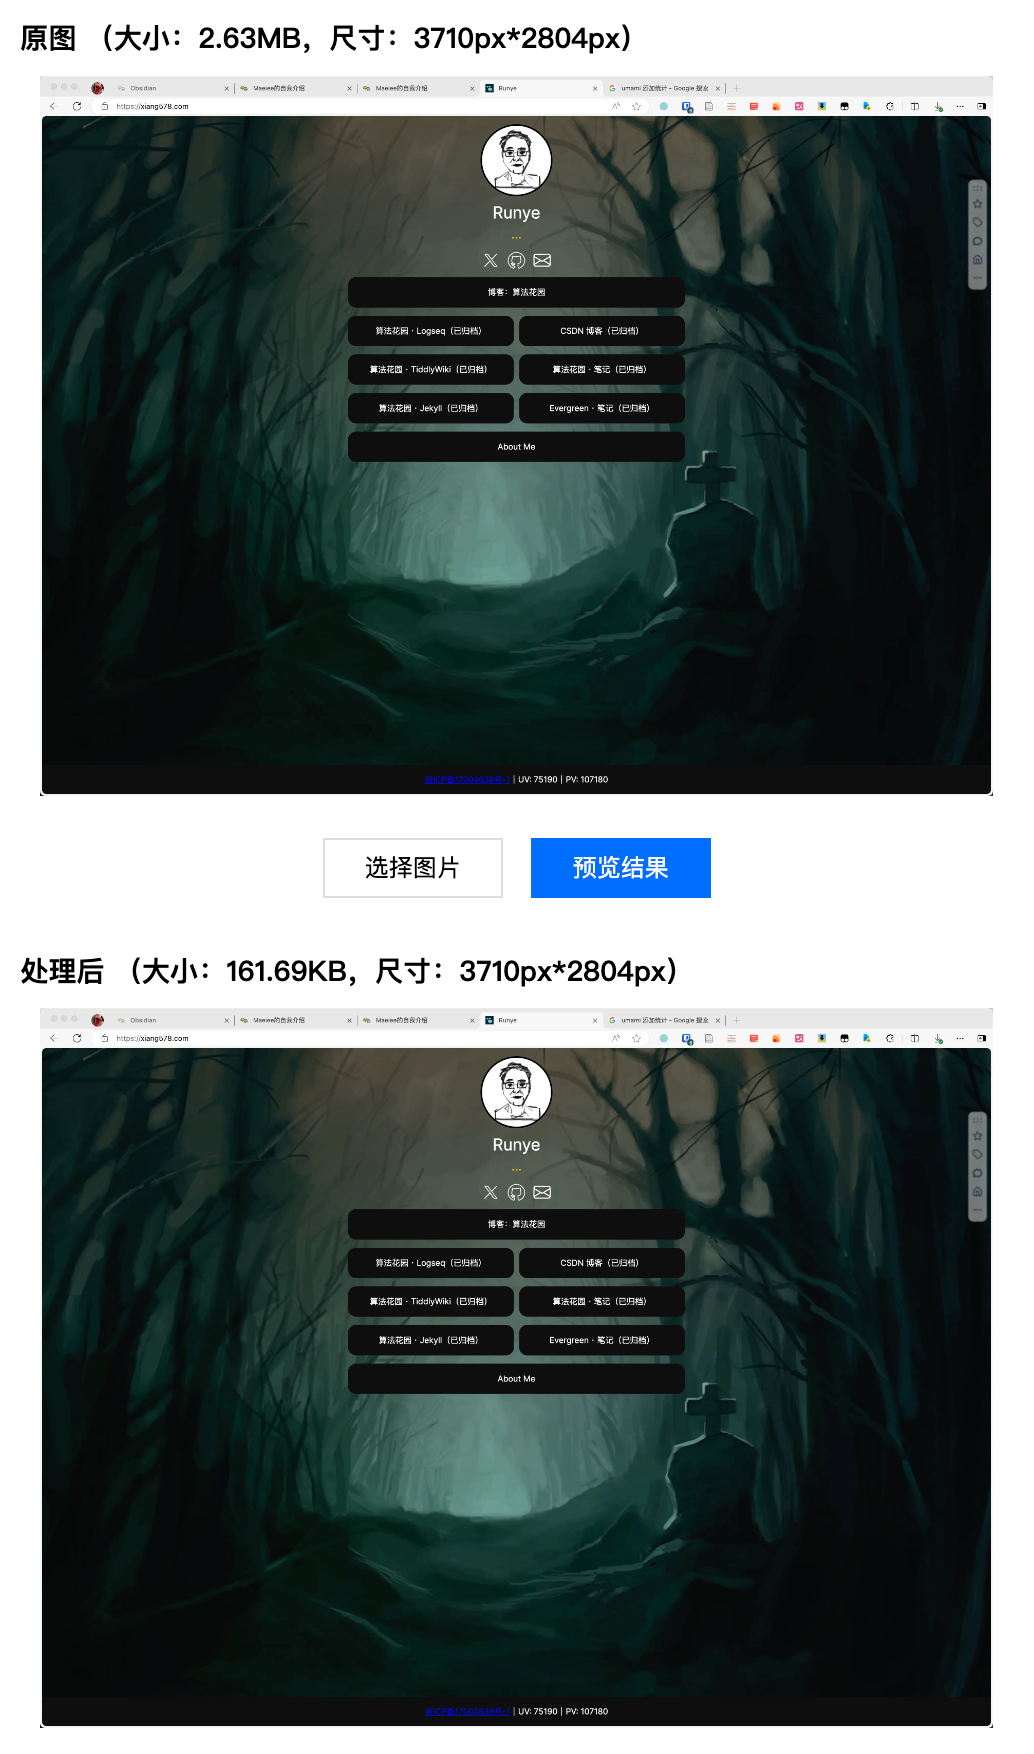
https://blog.xiang578.com/assets/image_1718352560106_0.png。腾讯云提供在图片链接添加不同后缀返回不同方式处理后的图片的功能,比如https://blog.xiang578.com/assets/image_1718352560106_0.png/webp会返回根据用户定义 webp 规则处理的图片。 - 从 数据万象CI购买_数据万象CI选购 - 腾讯云 (tencent.com) 看,基础图片处理价格起步是25 元 1 年 1 TB ,也不是很贵。
- 一直以来使用腾讯云的图床托管图片,链接类似于
图片处理
- 用户规则在桶的
规则管理 - 数据处理 - 图片处理 - 图片处理样式里指定
- 用户规则在桶的
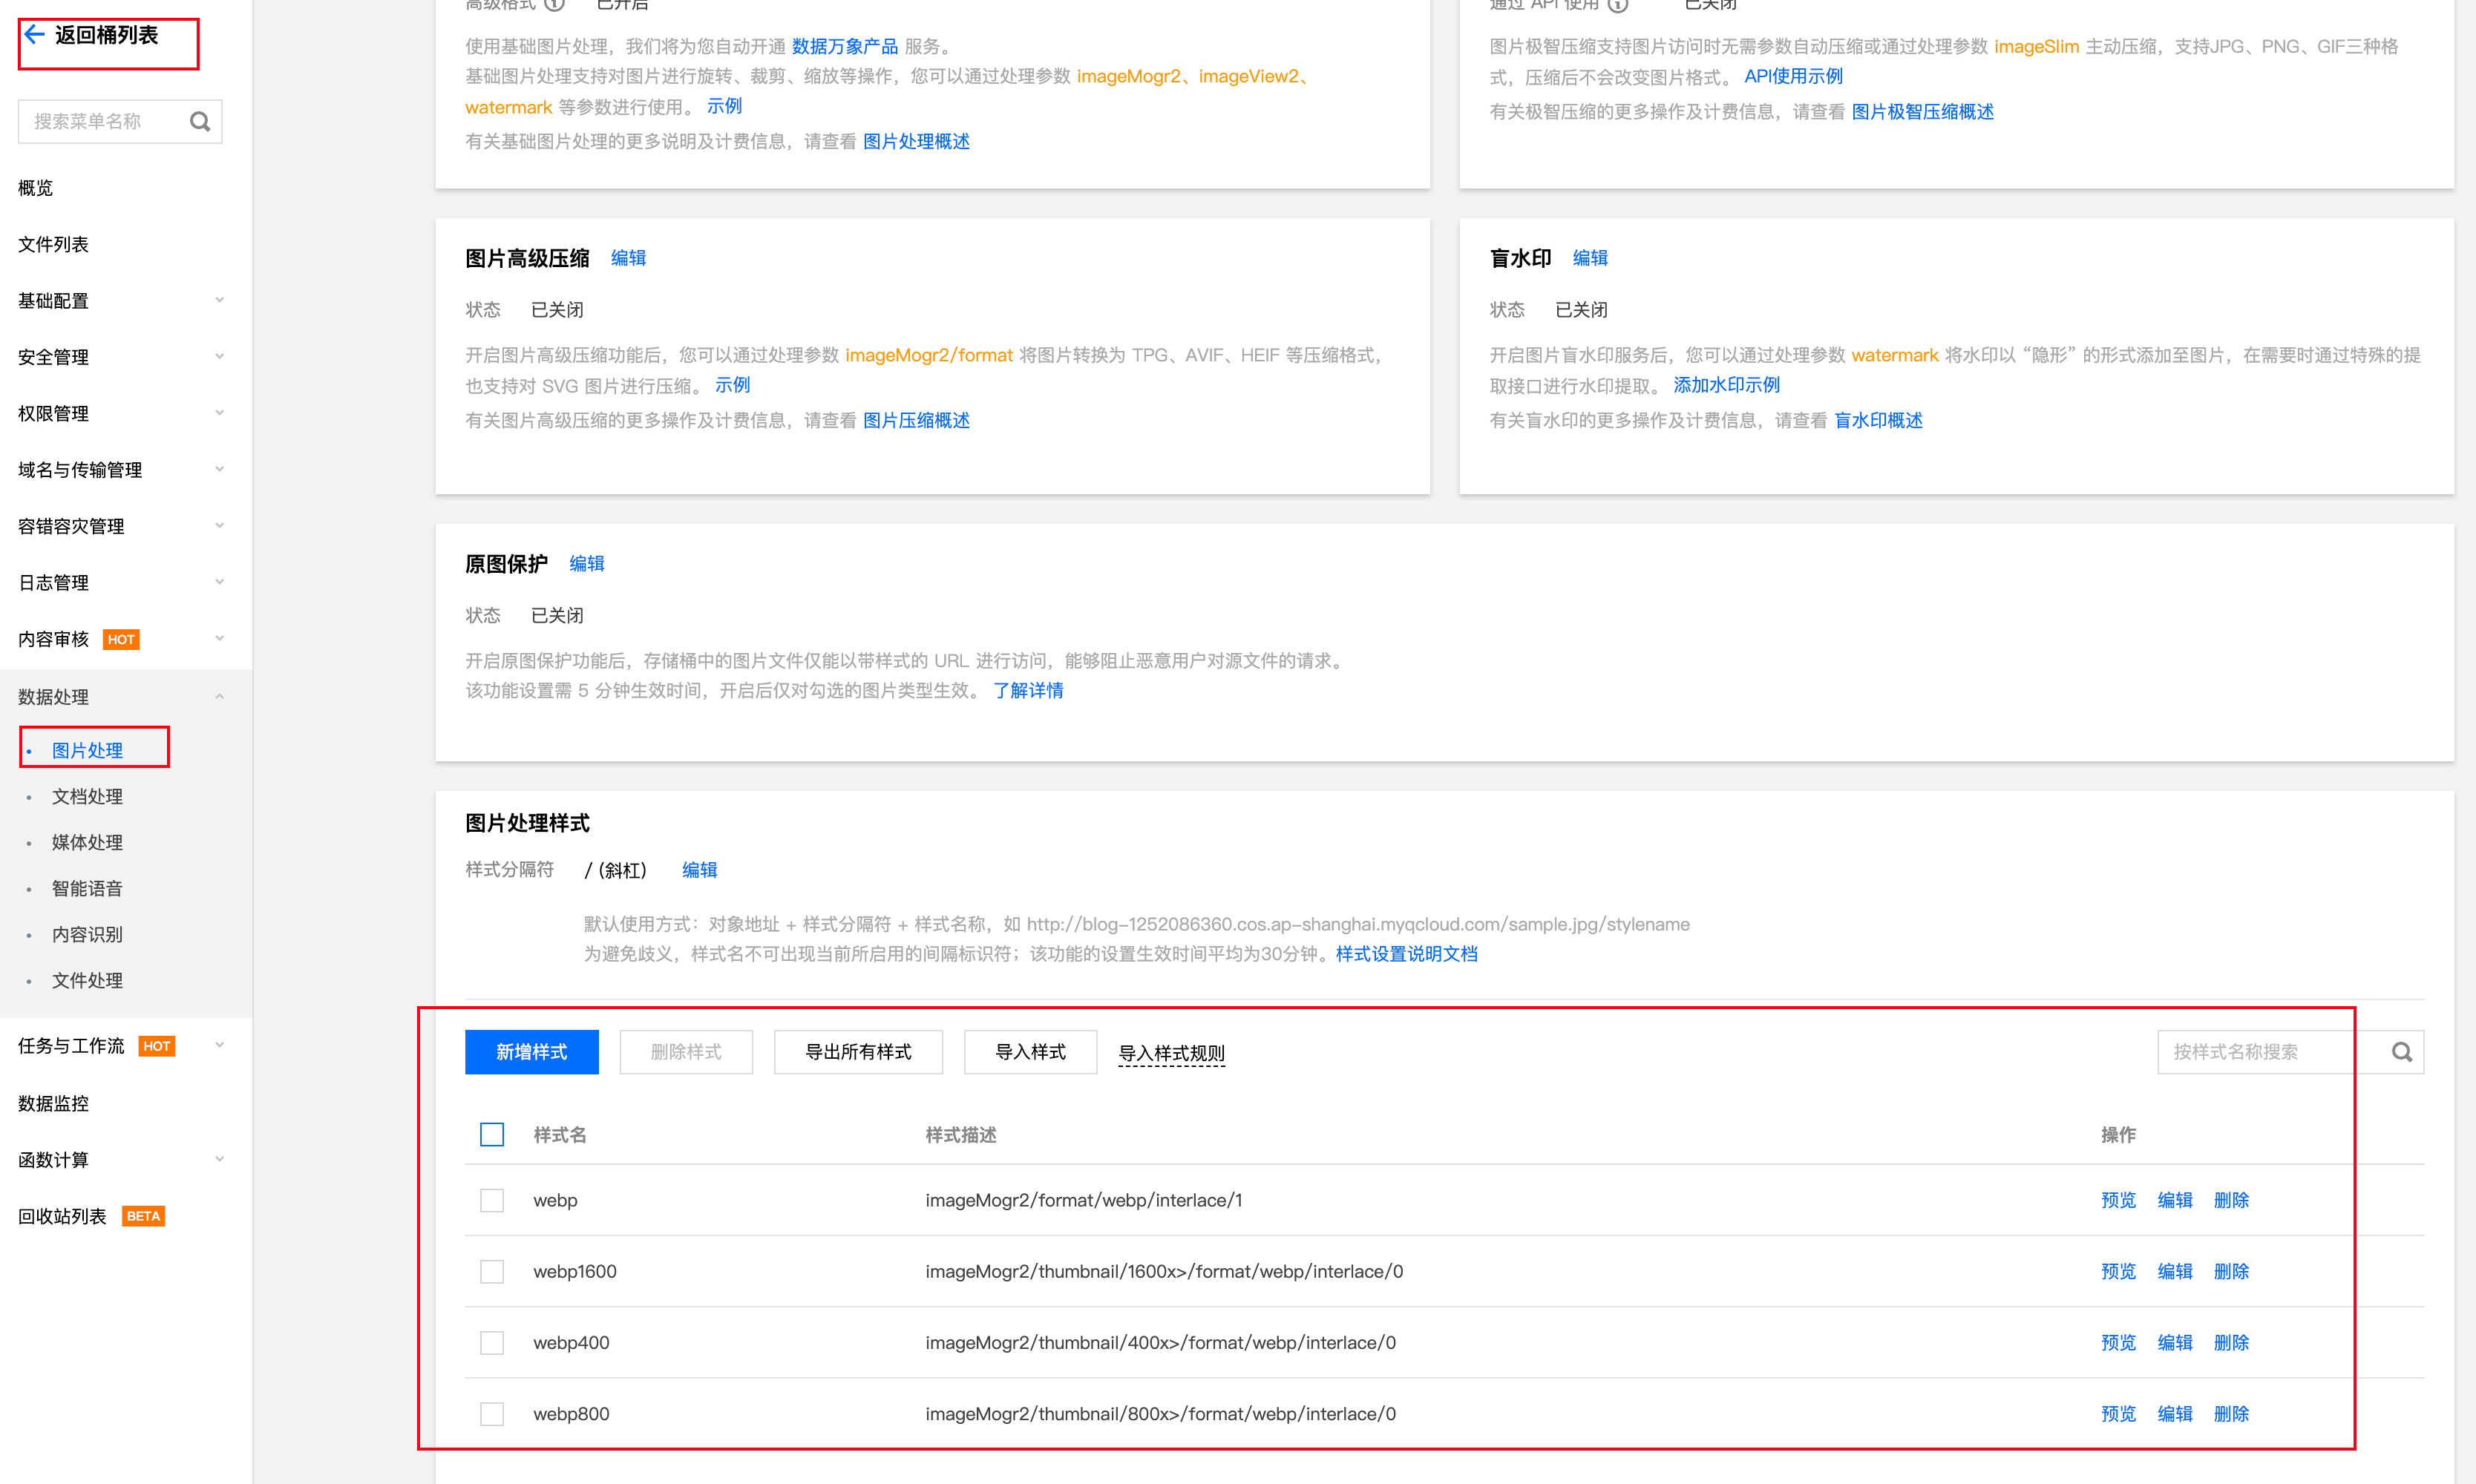
+ selfboot 定义了 4 种规则(原始/1600/800/400 等不同大小的 web,直接 copy 人家的方案。
1 | styleName: webp, styleBody: imageMogr2/format/webp/interlace/1 |
自适应图片
- 完成压缩配置后,不可能手动将原来的所有图片链接都添加上相关的后缀。所以 selfboot 提供一个脚本,实现 hexo 渲染 html 时替换图片链接以及增加 scrset、sizes 等属性。
- 在 hexo 项目根目录创建文件
scripts/img.js,具体代码如下。不过要注意一点,const imgPath = path.join(__dirname, "../images", imgPathPart)中的"../images"需要改成你的图片文件地址。比如我的图片放在根目录下的source/assets就改成"../source/assets"。
1 | const cheerio = require("cheerio"); |
效果测试
- selfboot 提到一个工具 RespImageLint (ausi.github.io),不过不知道自己为什么一直使用不成功。
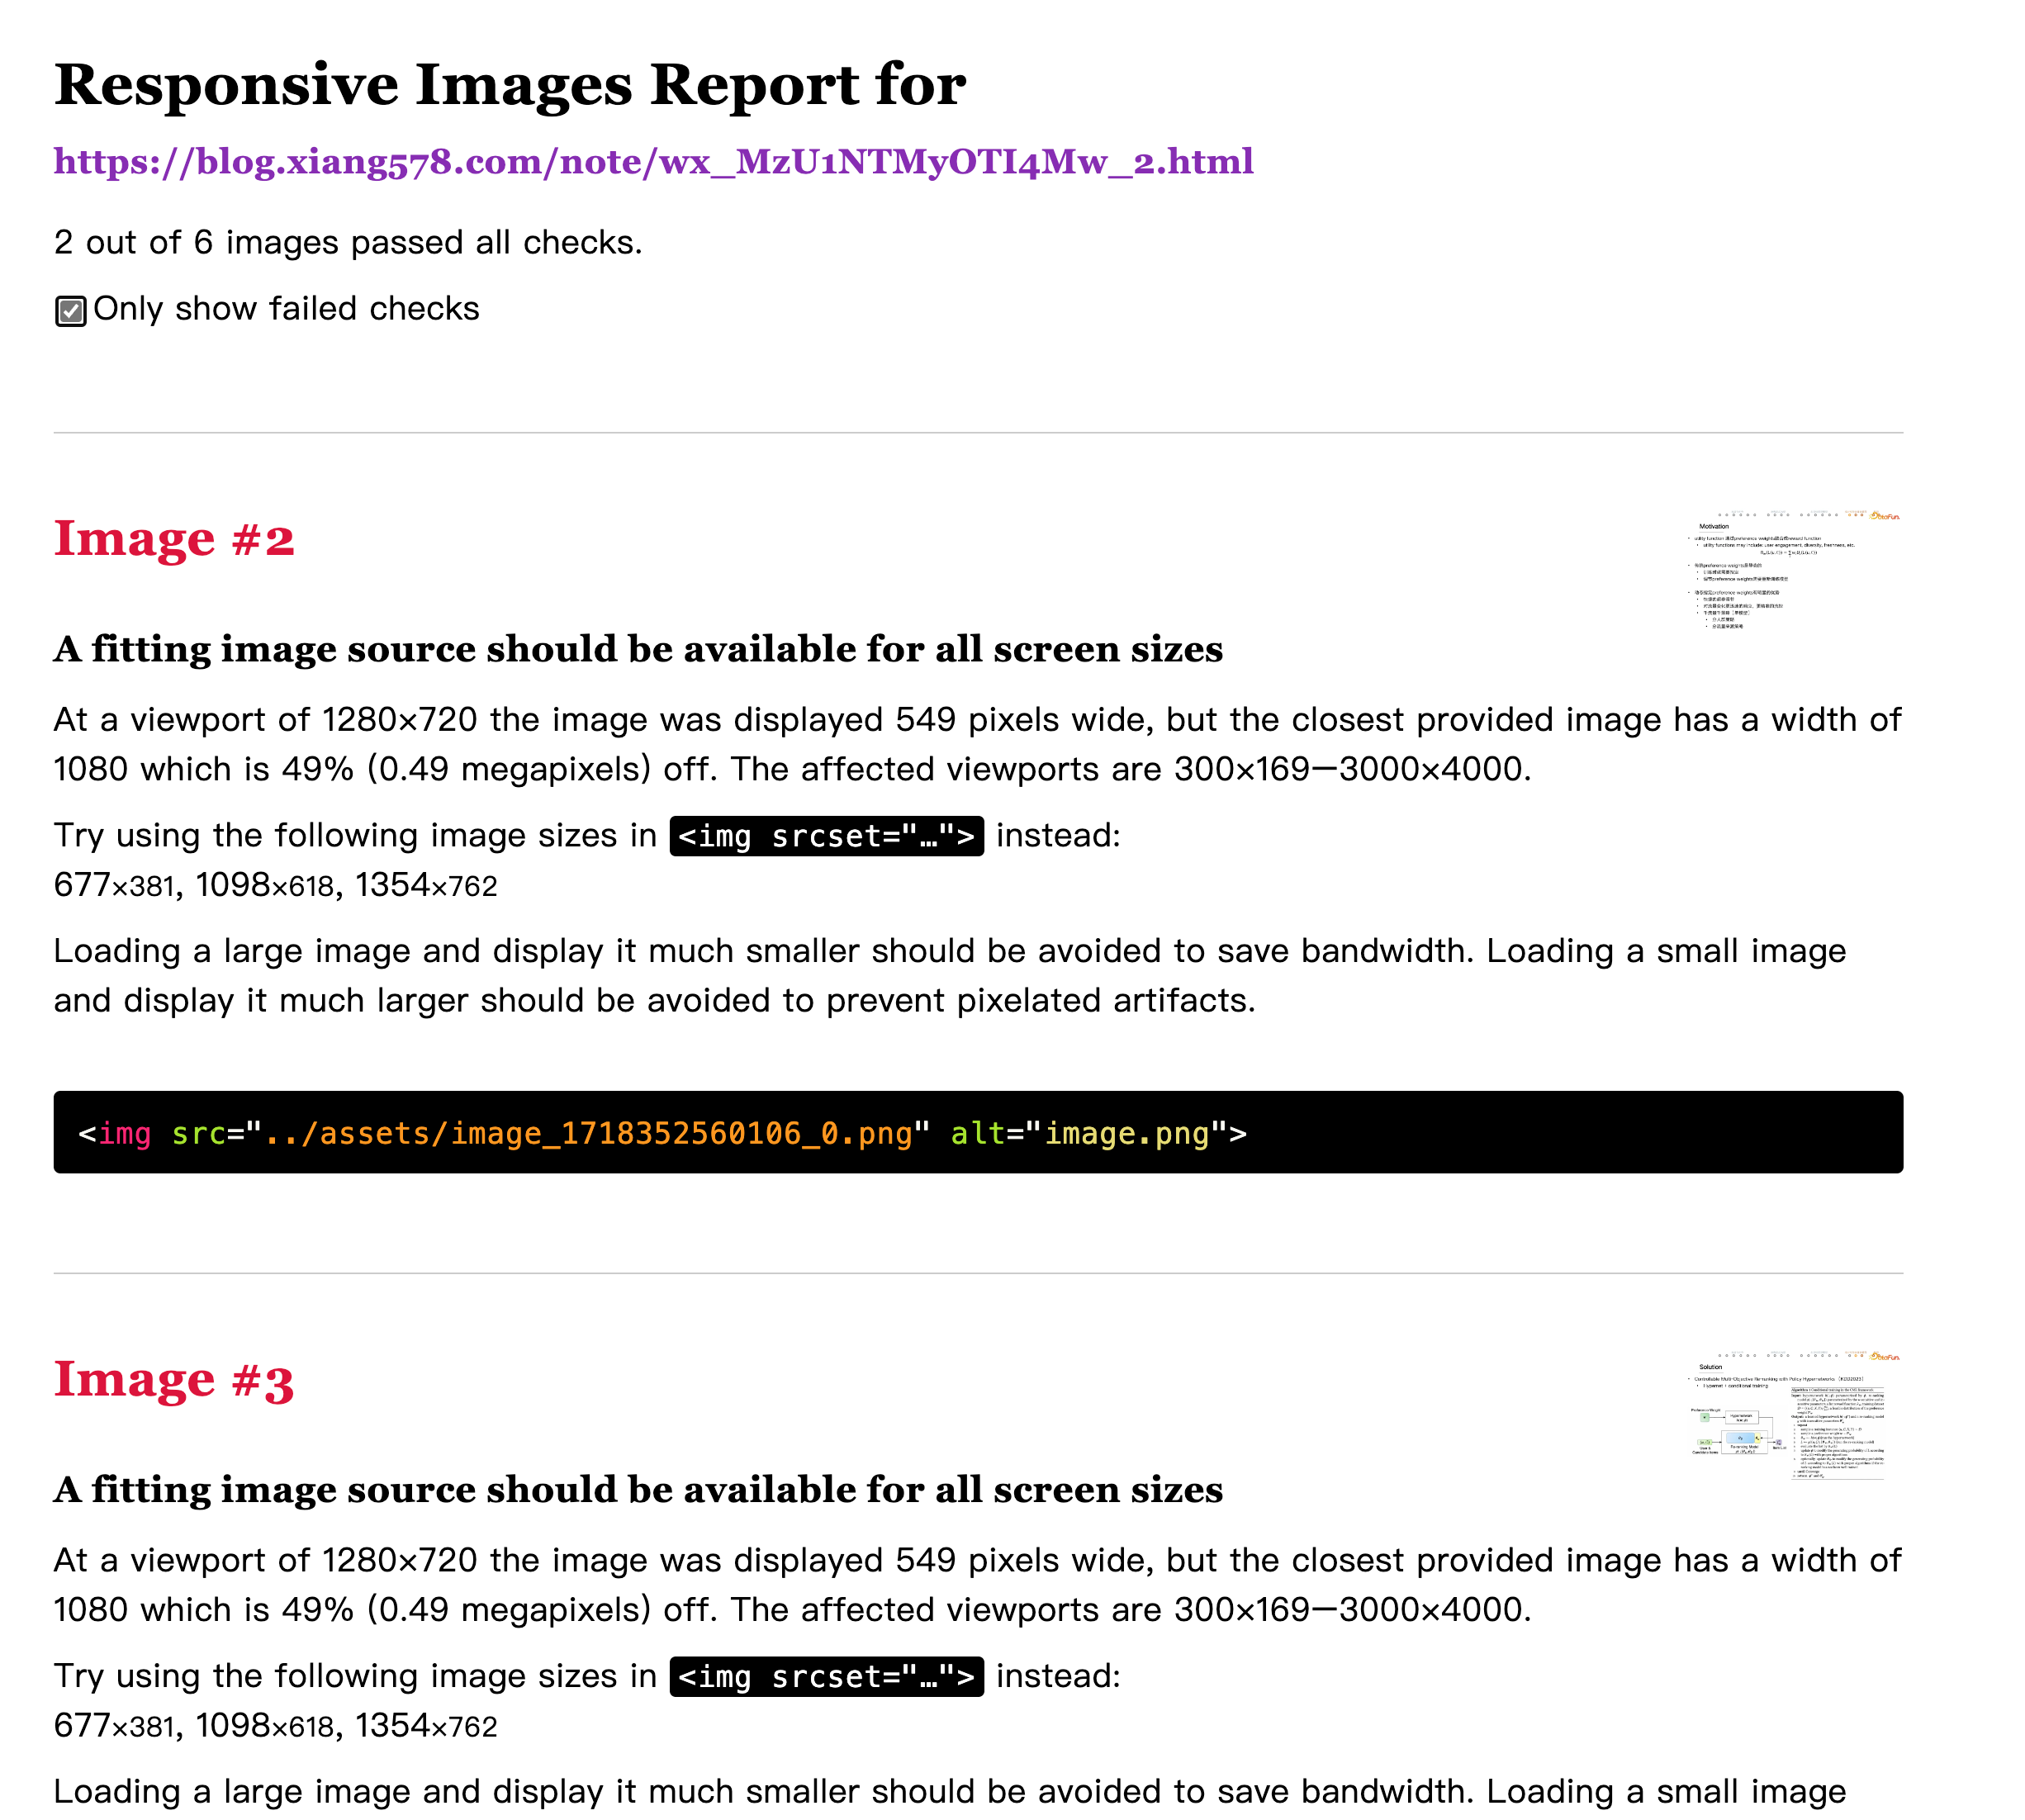
+ 另外一个方法就是通过开发者工具,查看请求的图片是否符合预期。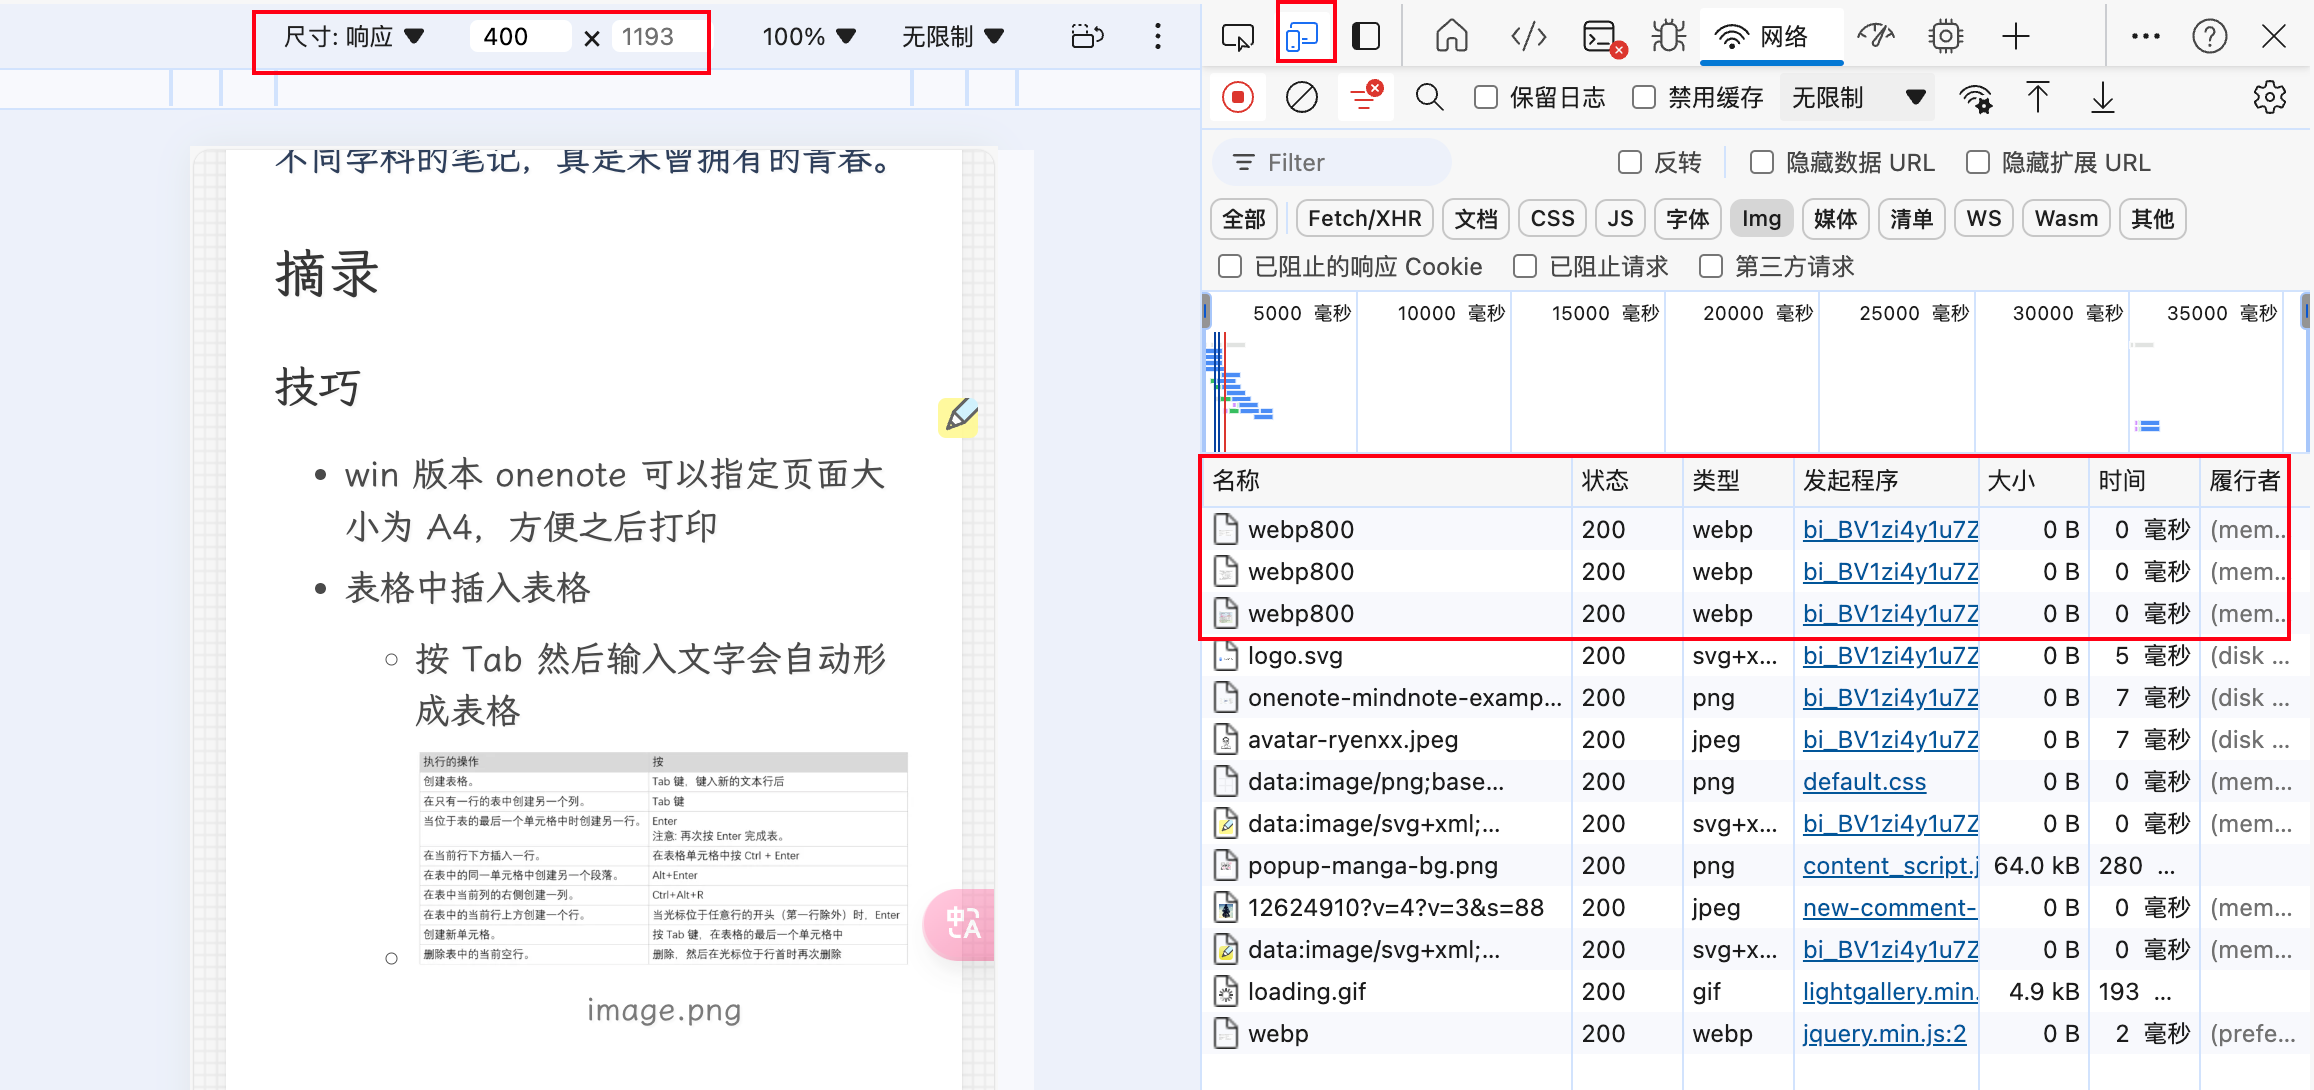
hexo 博客图片 webp 优化