从零开始利用 hexo + Github/Coding 搭建个人博客
更新历史
- 2015年8月15日:完成初稿
- 2017年10月05日:添加新主题
Even相关内容 - 2017年10月11日:文章阅读次数统计
- 2018年1月19日:修改页脚
- 2018年3月26日:双更新
- 20220226: 首页隐藏指定文章
前几天自己在电脑上装Linux时,不小心把博客的数据文件夹给删了。无奈重新安装,同时写下这篇备忘录以防万一。当然,经历这个失误,看来也要利用网盘对博客的一些文件进行备份。
安装 git 和 Node.js
就是正常的在他们官网上下载最新版本,然后再点几下鼠标安装到你的电脑。不过,也许后面安装hexo时要设置node.js的环境变量,具体过程也可以百度到。
安装 hexo
打开gitbash(可能需要以管理员身份运行),利用npm命令安装。
1 | $ npm install -g hexo |
安装成功后大概会在shell中出现下面这样的信息
部署hexo
比如我要安装在E盘hexo文件夹内,可以在gitbash中使用下面命令进行。如果你想明白这些命令是什么意思,可以百度cmd指令。(如无特殊说明,下面有的命令都在/E/hexo中使用gitbash完成)
1 | $ cd /E/hexo |
安装成功后大概会在shell中出现下面这样的信息
安装依赖包
基础功能包,采用下面的命令安装
1 | $ npm install |
deploy git功能相关插件,网上发布时用的……
1 | $ npm install hexo-deployer-git --save |
附加功能有sitemap和feed插件,如果你不懂这些也没有必要安装
1 | $ npm install hexo-generator-sitemap |
第一次本地查看博客
执行以下命令,然后到浏览器输入localhost:4000查看。
1 | $ hexo g |
默认大概是下面的样子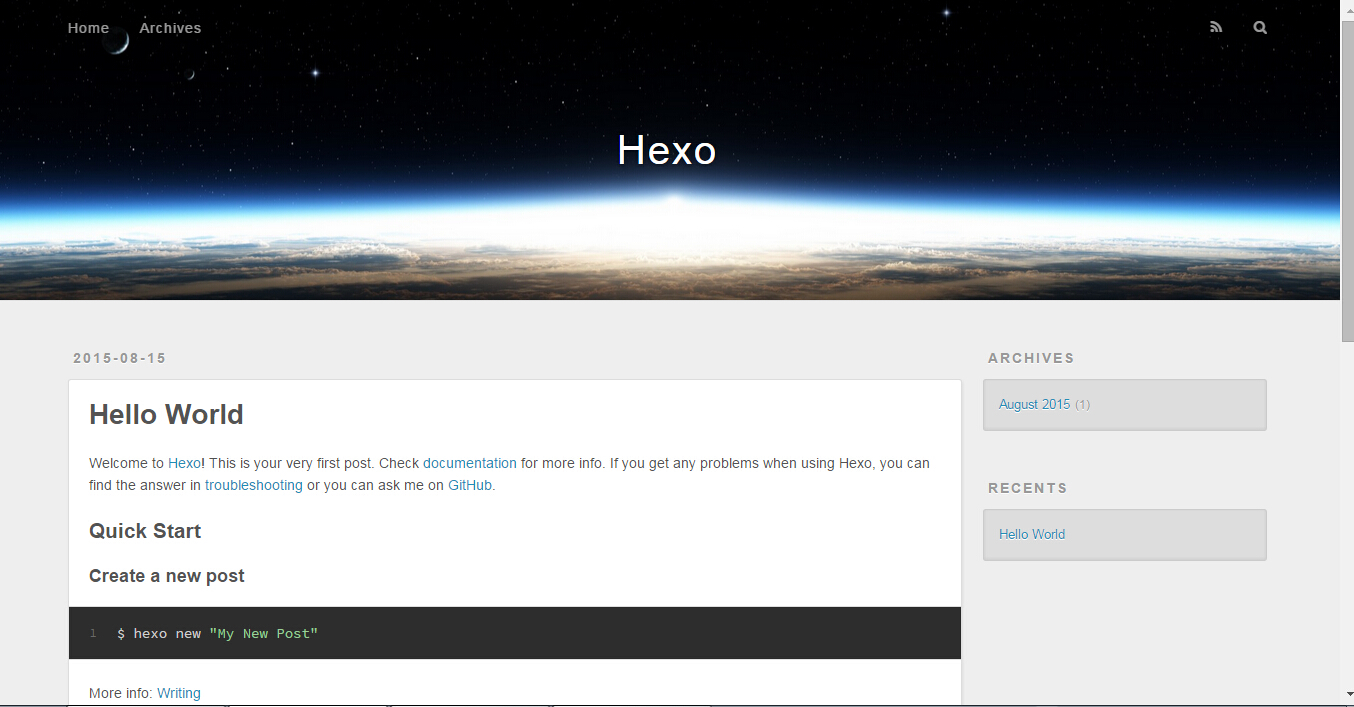
github相关部署和ssh设置
我的这些功能还可以用,所以没有重新设置。故不能详细论述,你可从下面参考链接中获得方法。
发布功能部署
编辑站点的_config.yml文件。你在部署时,要把下面的xiang578都换成你的账号名。
1 | deploy: |
执行下列指令即可完成部署,中间需要输入github用户名和密码。
1 | hexo generate hexo deploy |
安装主题(以NexT为例)
使用gitbash输入下面指令
1 | $ cd your-hexo-site |
启用主题
修改Hexo目录下的config.yml配置文件中的theme属性,将其设置为next。运行hexo g和hexo s,并访问 http://localhost:4000,确保站点正确运行。
主题优化
参考相关主题的说明文档进行优化,或者访问使用相同主题的博客,查看博主相关文章。或者速成css和html自己改造。
next主题404页面改造
E:\hexo\public中创建404.html文件,复制下面代码,并保存,在配置文件中启用相关功能。
1 |
|
效果如下: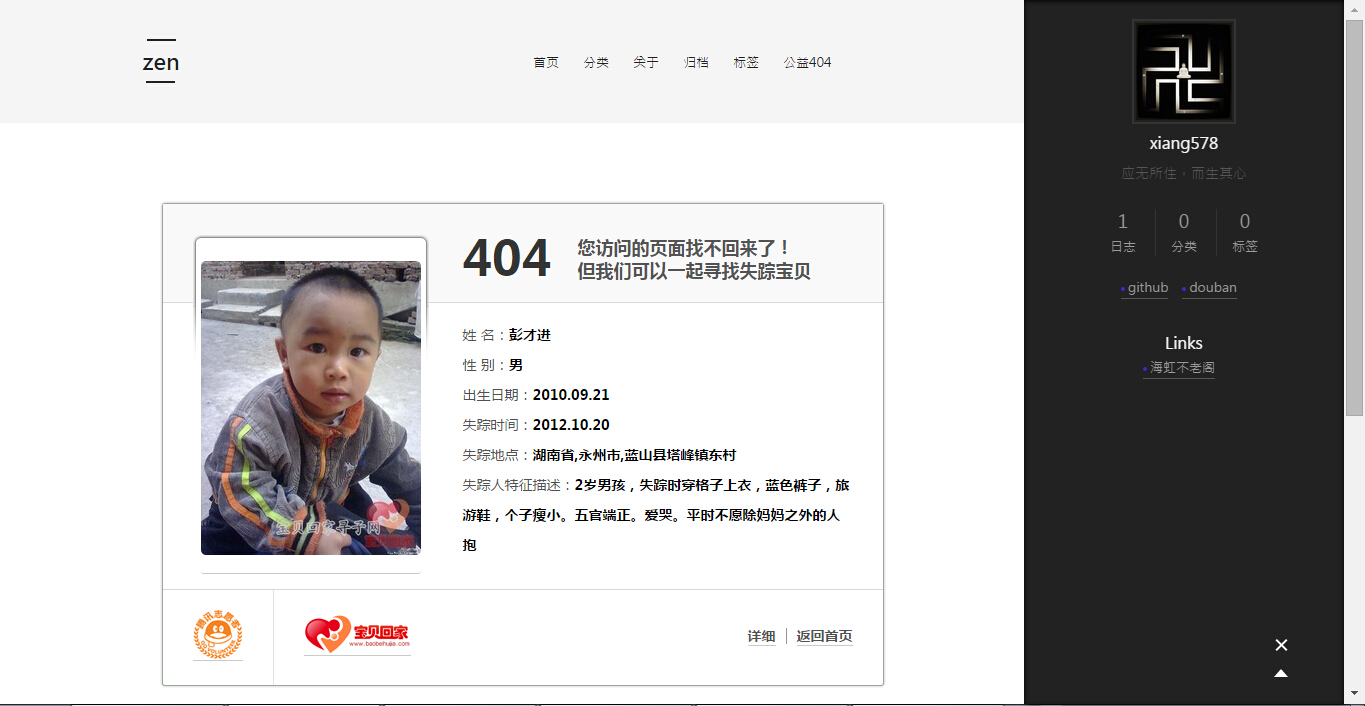
多说评论改造
效果如下: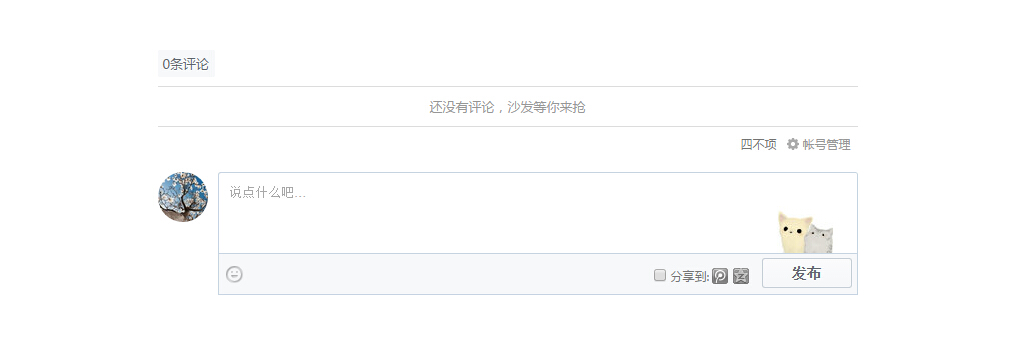
域名绑定
域名可以在万网上购买,大体上流程和淘宝购物差不多。现在大部分域名第一年价格比较便宜,续费也可以接受。当然如果你非要买.集团这种上万的域名,那么请联系我,土豪做个朋友吧!域名是有兴趣可以选择购买,采用默认的github.io也不错。
首先在E:hexo\public文件夹下创建名为CNAME文件(不要扩展名)接着输入你的域名。比如:
1 | xiang578.top |
接着在万网的域名控制台增加如下图所示的两个解析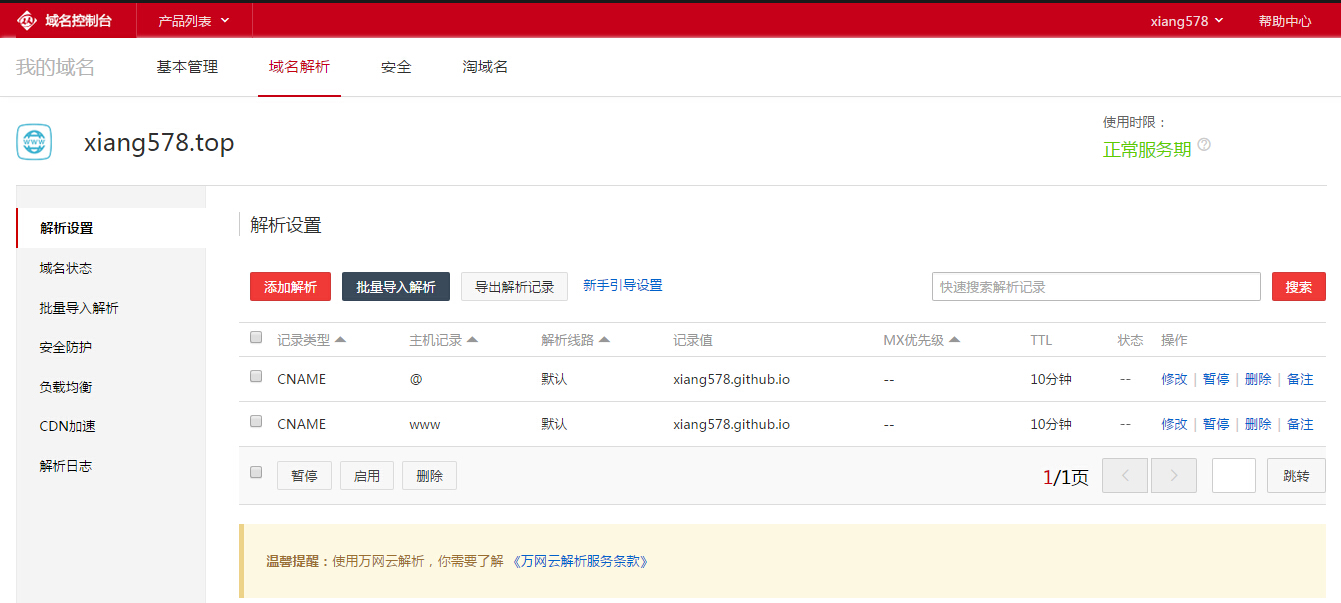
为 next 主题添加分类
去除 Coding Pages 等待跳转页面
根据常识,只需要修改主题下面跟页脚相关的代码即可。比如 Even 主题中相关的代码在 themes/even/layout/_partial/footer.swig。
然后在这个文件中添加如下的代码即可。
1 | <span class="hosted-by-coding-pages"> |
最后,在项目的 Pages 服务中勾选已放置 Hosted by Coding Pages,等待审核通过就去除等待跳转页面。
修改Even主题的首页
不知道为什么,我不是很喜欢首页那种标题和文章摘要的形式。所以,决定把首页改造成归档页面的形式。
这步改造的思路是将生成归档页面相关的代码复制到生成首页的模板上去。在 themes/even/layout 文件夹里面修改index.swig,具体如下:
1 | {% extends "_layout.swig" %} |
如果需要在首页显示所有的文章,可以参考 如何设置页面文章的篇数? 安装需要的插件,将 per_page 设置为0即可解决。
添加文章统计
- 参考 添加文章访问量统计以及 leanCloud,实现文章阅读量统计
- 自己使用时发现一个问题:每篇文章只有第一次打开时才显示阅读次数,而且计数都为1
- 参考Hexo搭建博客系列:(五)Hexo添加不蒜子和LeanCloud统计无标题文章中提到的创建 class 需要
数据条目的默认 ACL 权限中选择无限制
- 参考Hexo搭建博客系列:(五)Hexo添加不蒜子和LeanCloud统计无标题文章中提到的创建 class 需要
修改页脚
未修改之前的页脚相关代码(themes/even/layout/_partial/footer.swig)
1 | <div class="copyright"> |
未修改之前的效果

双更新
同时在 github 和 coding 上更新,然后根据访问时的 ip 地址跳转到不同的服务上。
下图框中的 a 和 b 为两个库的地址。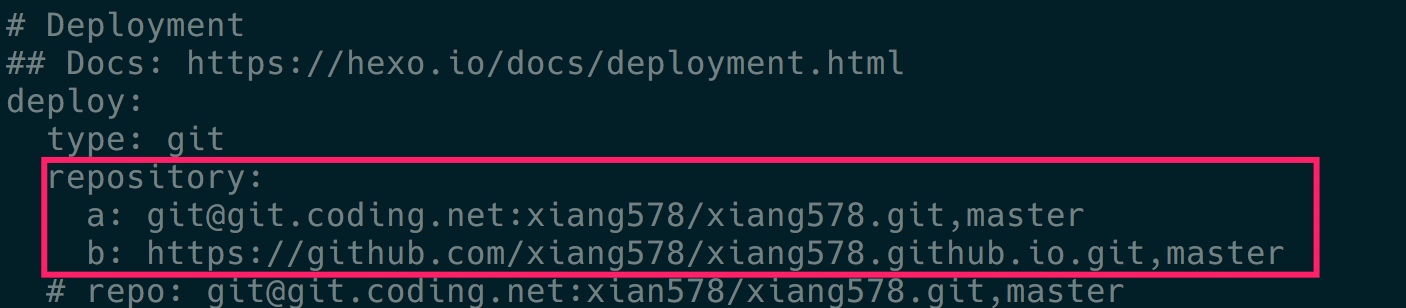
github 项目中相关的地址修改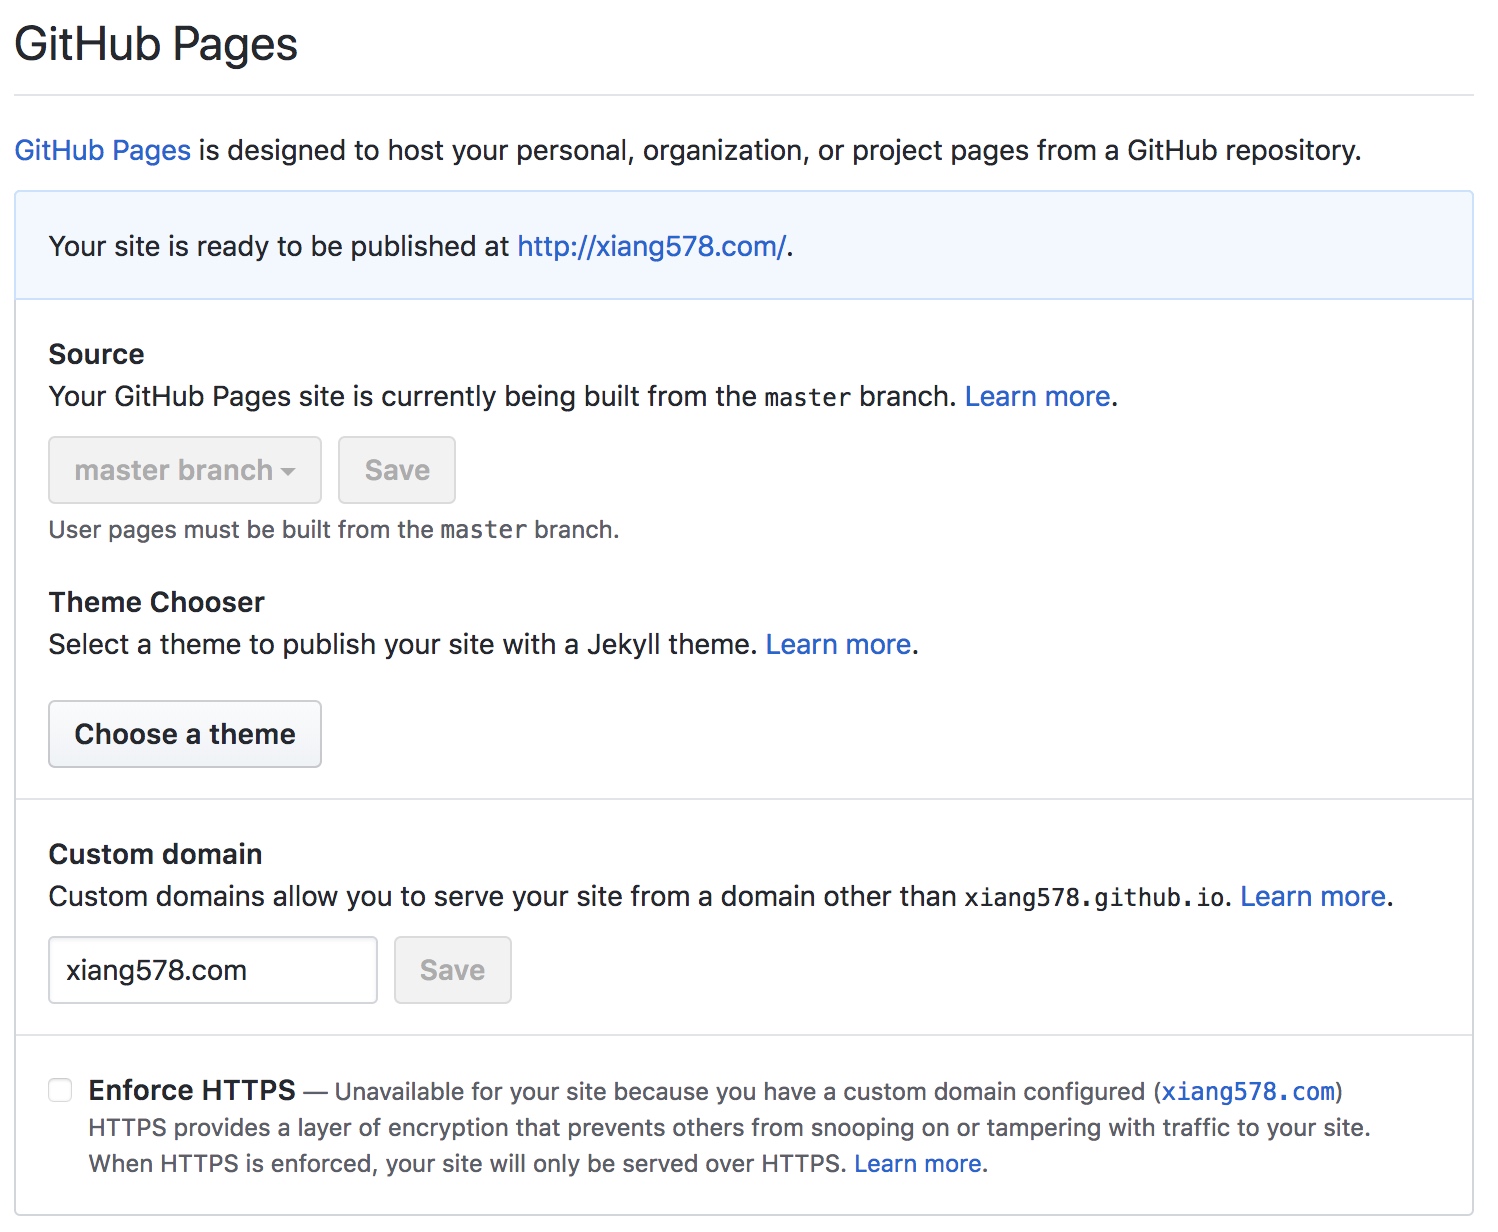
最后,域名解析服务中添加如下的解析方式。
自动备份博客相关的源文件
参考博文自动备份Hexo博客源文件 | Jolson’s Blog
设置首页隐藏指定文章
- 文档 YAML 中增加一个参数
notshow:控制是否展示 - 修改主题
index.swig
1 | {% for post in page.posts %} |
改成
1 | {% for post in page.posts %} |
大概这样就完成一个博客的安装和部署,接下来你就可以快乐的写博客。
参考文章
从零开始利用 hexo + Github/Coding 搭建个人博客
https://blog.xiang578.com/post/how-to-build-a-hexo-blog.html